Have you ever wished to replicate your first surfboard? Do you think about remaking an old classic template? Are you looking to re-shape a favorite beaten, waterlogged board? Here's how to do it.
When we talk about surfboard shaping, there is often a heated debate on using technology to assist craftsmanship.
Should all surfboards be shaped by hand, one by one? Is it a sin to introduce machines in the board-building process?
The answers will never be unanimous.
The truth is that machines, or even robots if you prefer, are increasingly taking over the surfboard production process.
With the advent of computer numerical control (CNC) machines, shapers multiplied the production of any template several times.
In a few years, even some of the most conservative board builders surrendered to the time-saving and precision of CNC and focused their time and effort on designing high-performance templates that meet their customer base.
At some point, if you own a business, it's a choice you have to make: commit to the old shaping methods or compete directly with the thousands of industry players.
With no judgments or prejudice. And there are some innovations that could really make a difference.
For instance, who hasn't dreamed of having a particular surfboard recreated? An old template that is unrideable or a friend's magic surfboard.
Anyone who's surfed for over five or ten years has craved a specific board type with favorite length, width, thickness, and fin setup preferences.
However, until recently, it was hard to remake them. You'd have to bring the original board to a shaping room to be copied by eye by the craftsperson.
Sometimes, technological assistance is just too much, but in this particular case, it's actually quite useful.

How to Scan and Import a Surfboard into Shape3D
What if you could scan the surfboard you want to replicate in 15 minutes, make a few adjustments on the computer, and press "print" on the CNC machine?
Now, you can. The whole process is surprisingly quick and simple.
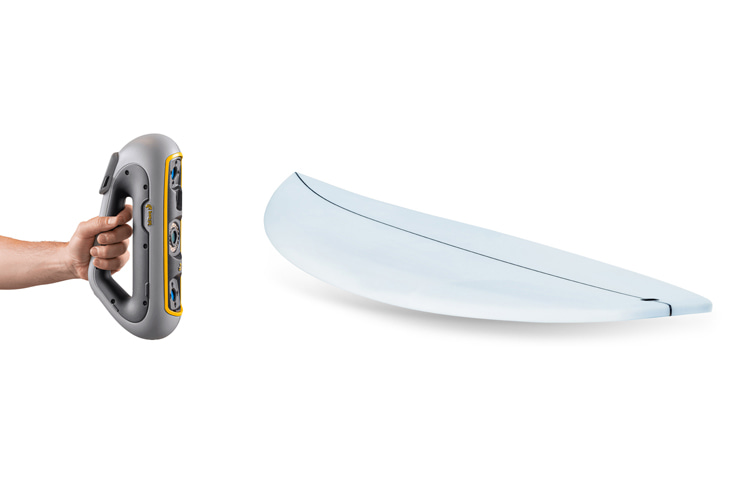
All you need is a hand laser scanner and surfboard design software like Shape3D, one of the most popular CAD/CAM computer programs for surfboard building.
Once you've got the file, you can ask your local shaper to make your dream board a reality.
Here's a quick guide on how to duplicate any surfboard or tweak modern designs in seven straightforward steps.
Step 1: Preparing the Surfboard for Scanning
Before starting to scan the surfboard you want to replicate, it's important to increase the quality of the data gathered by the scanner.
- Mask Black Logos and Plugs: Use white powder spray for masking. If unavailable, clear tape works fine. Masking the fin plugs is optional;
- Place Targets: Apply small target stickers about every 8 inches (20 centimeters) on the flat surfaces, i.e., deck and bottom;
- Board Condition: Removing wax is not necessary, but it can help when you get to the software stage;
Step 2: Scanning the Board
Once the initial setup is finished, it's time to take the most precise possible three-dimensional picture of the board.
- Scan the Deck: Press "Start" and scan the deck. Move at a steady pace; if the scanner loses track, restart from a previously scanned area;
- Scan the Rails: Go slower on the rails since they could lack targets; if tracking is lost, restart from the deck and proceed carefully along the rails;
- Scan the Bottom: Flip the board and scan the bottom after completing the deck and rails;
- Merge Scans: Use the 3D scanner software to merge deck and bottom scans;
Step 3: Processing the Scans
It's now time to look at the scan results and optimize, correct, and fine-tune the output image.
- Clean Scans: Remove unnecessary elements like the table by selecting "Connected Entities," reversing the selection, and deleting;
- Merging Scans: Use surface merging (not target merging) to combine the deck and bottom scans;
- Adjust the Resolution: Apply the best fit to ensure precision;
- Optimize Meshes: Convert the scan into meshes and reduce resolution (e.g., to 4 mm);
- Fill Gaps and Optimize Surfaces: Perform basic repairs to remove dings and small crevices and holes;
- Smooth and Decimate: Use the smooth function to eliminate wax-related irregularities. Decimate the mesh to reduce the number of meshes (e.g., from 150,000 to 12,000) for easier import into Shape3DM;
Step 4: Aligning and Exporting
Once you're happy with the final replicate look of the surfboard, it's time to export the image file.
- Align with the Axis: Use basic alignment to position the board with the origin;
- Export the STL File: Save the cleaned, aligned scan as an STL file for Shape3D import;
Step 5: Importing into Shape3D
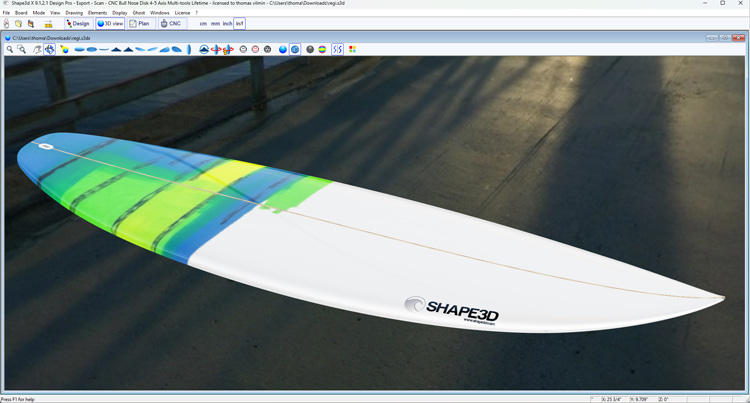
The surfboard scanning file has been exported and can now be read in the Shape3D software.
- Import the Scan: Go to File > Scan Import in Shape3D and load the STL file;
- Fine-Tune the Board's Position: Ensure the board's nose is on the right-hand side and adjust the X-axis direction;
- Perform an Automatic Symmetry Check: Shape3D automatically adjusts the scan for symmetry;
- Extract Board Details: The software identifies the board outline, stringer curve, and cross-sections (default is 5 slices, but more can be imported if needed);
Step 6: Refining the Model
It's time for the final improvements to the replicated template before it can be "printed."
- Fix Imperfections: Check and correct stringer curves and slices manually, especially near the nose and tail, where scans may not be as clean:
- Copy and Paste Slices: Do it for consistent shapes, making adjustments as needed;
- Compare with Original: Load the STL scan as a ghost board to compare the scanned data with your refined Shape3D model;
Step 7: Adding Final Details
We've reached the final step, and all you need to do is place the fin plugs and add the stringer.
- Fin Plugs: Load a photo of the board as a ghost image to place fin plugs accurately. Adjust positions manually as needed;
- 3D Visualization: Add a stringer and other details in the 3D view for a realistic representation;
Words by Luís MP | Founder of SurferToday.com


